
Contact Forms
Your contact forms can be edited within the Forms menu item in the WordPress backend.
These forms are built using the Gravity forms plugin [Gravity forms documentation]. This allows for flexible editing of the existing fields as well as customization of the email notifications and reviewing of prior form submissions.
Editing a Form
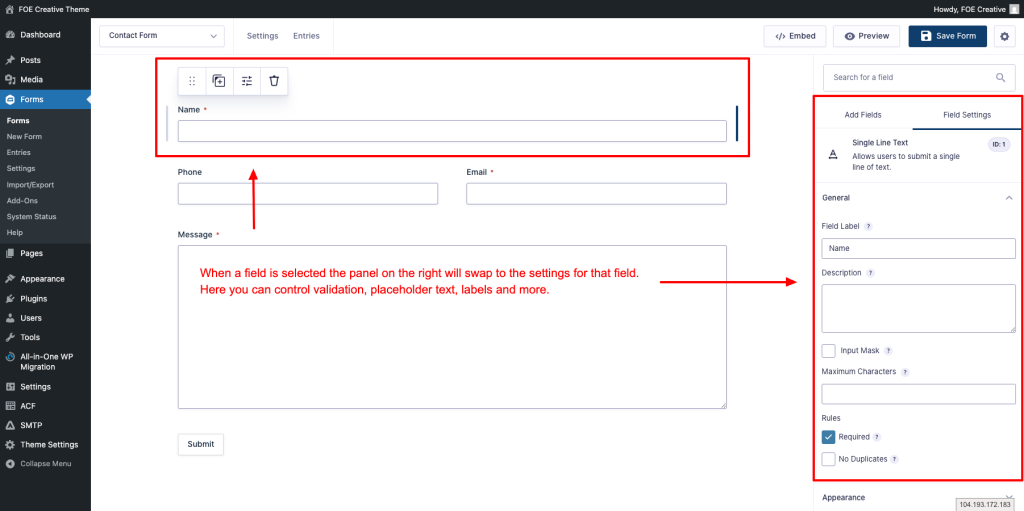
To edit a form select it from within the forms menu. From the edit form page you can re-order the existing fields or add more fields to the form. You can drag/drop the fields to change their order. The ‘Add Fields‘ menu in the right panel can be used to generate new fields for the form.
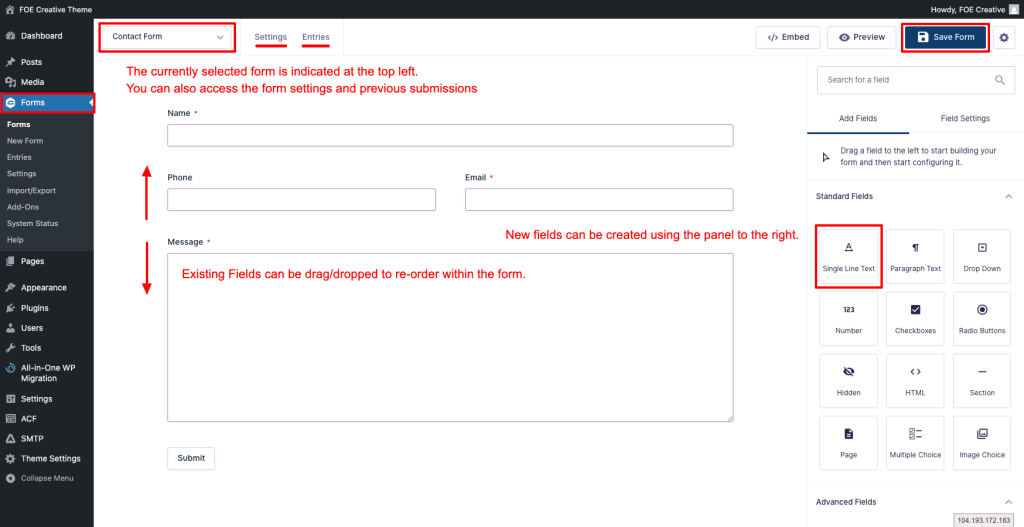
Make sure to set custom and descriptive labels for any new fields that are created. Marking important fields ‘Required‘ is important for form validation.
Editing Notifications
The notifications for your form can be editing under the Form Settings > Notifications. The Admin notification is the primary notifcation that sends on form submission. The ‘Send To Email‘ field contains a comma seperated list of email accounts that will receive the submission. Add new emails here to add new recipients. The rest of the fields are tied to the SMTP sender and shouldn’t be touched without experience with email routing.
The Message field towards the bottom of the settings represents the body of the email notification. This relies on the {all_fields} merge tag to output a table of all contact form fields as the main content for the email. Additional text/content can be added here if needed.
Previous Entries
Clicking on entries will show you a list of all the previous contact form submissions that have been sent. Viewing a specific entry will show you all the fields values that were submitted and will include a log of any notification sending errors. There are controls available here to resend the email or mark them as spam.
You can export a full CSV of submission from any of your forms by using the interface withing Forms > Import/Export